Screen Canvas
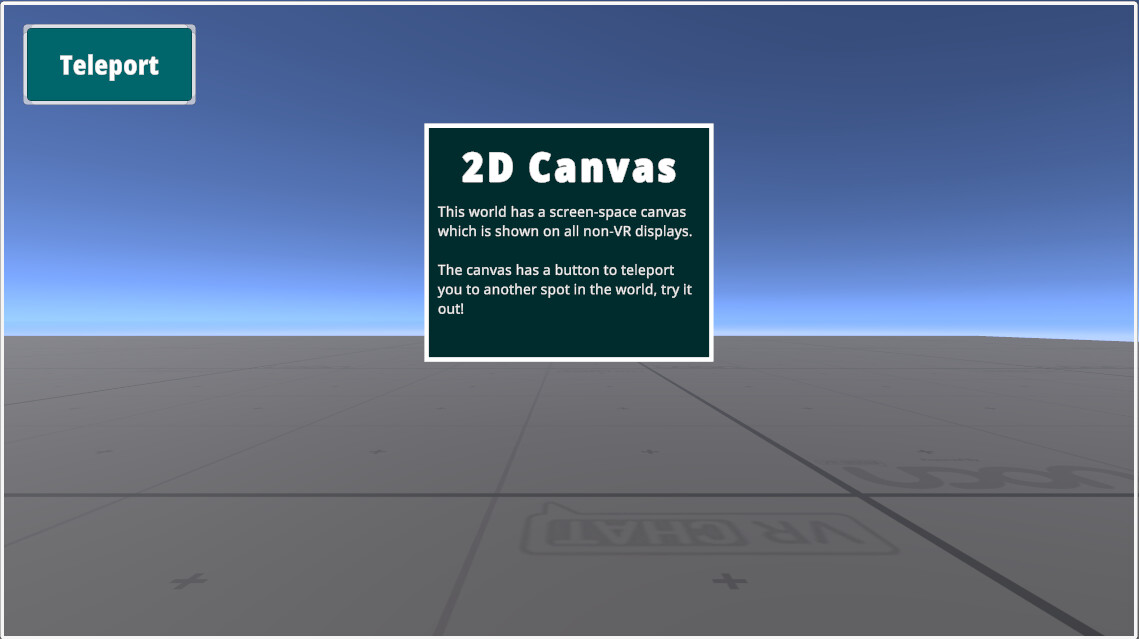
This example shows how to create a Screen-Space UI Canvas for users on 2D screens like Mobile and non-VR Desktop. It also demonstrates how to teleport the user to a destination position and rotation.
Visit the Screen Canvas Example World to try it for yourself!
Using the Example
Open the screen-canvas scene to first test it out in the Unity Editor, or visit this world in the VRChat Client.
This example requires TextMeshPro, a window will show offering to "Import TMP Essentials" if you don't already have TextMeshPro in your project. Accept this offer and re-open the scene after it's done importing.
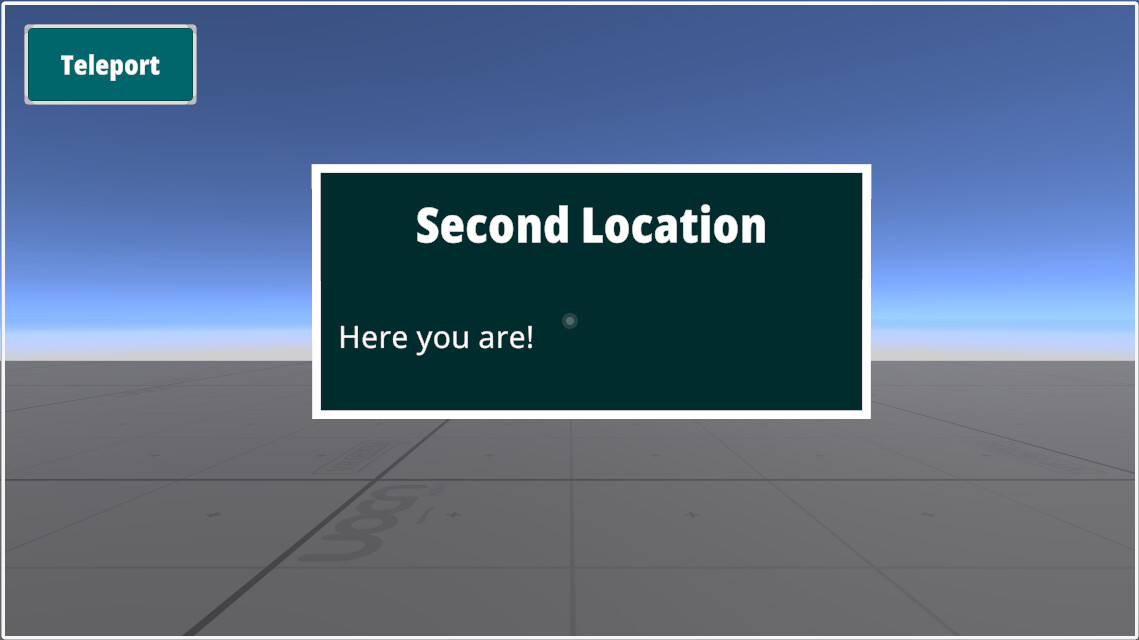
When entering the world with a non-VR display like a Mobile Device or a Windows PC with a monitor, a thick white outline will be visible around the edges of the display, as well as a button that reads "Teleport". Press this button - on mobile, a simple screen-tap will activate it. On Desktop, hold the Tab key to free your cursor from the center of the screen and press it. Either way, you are teleported to a second spot in the world, in front of another canvas which reads "Second Location / Here you are!".
When you visit the world using a VR display, the canvas is hidden, rather than being stuck to your face with no way to use the button.
Extras

The VRCButtonLayout object is a helpful tool for showing where different buttons in the VRChat Mobile UI will appear so you can try to work around them. It is tagged EditorOnly and will not be uploaded with your world.
Importing the Example
Follow the steps below to add this example to your Unity project:
- Open the Example Central Window from the window from the Unity Editor Menu under "VRChat SDK > 🏠 Example Central"
- Find this prefab in the list or search for it by title (same as the title of this page).
- Press the "Import" button to import the Unitypackage into your project.
Technical Breakdown
This section explains the two Graph Programs which provide the above functionality. You can find both programs on the "ScreenCanvas" object in the scene.
HideInVR
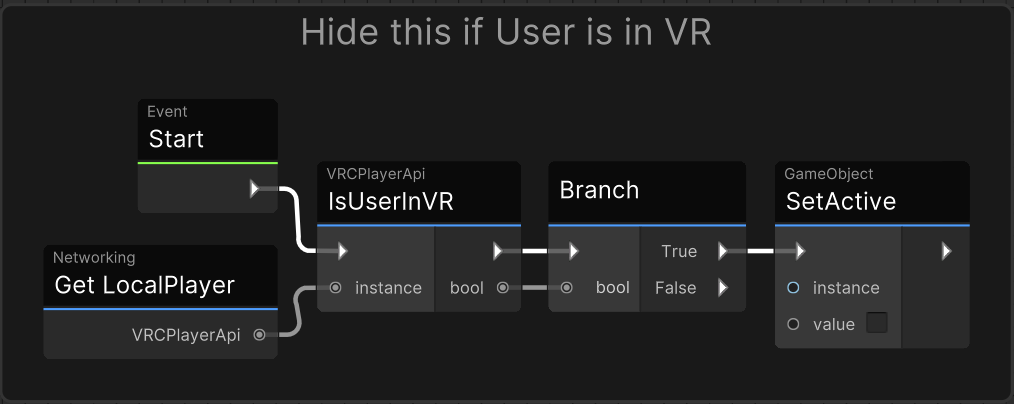
This program runs on Start, and deactivates the ScreenCanvas and its UdonPrograms by checking the value of IsUserInVR for the local player, and calling GameObject.SetActive(false) if they are. If they are not in VR, no further action is needed.
This program is provided separately from the teleportation functionality below to make it easy to add to a variety of objects.
TeleportToTarget
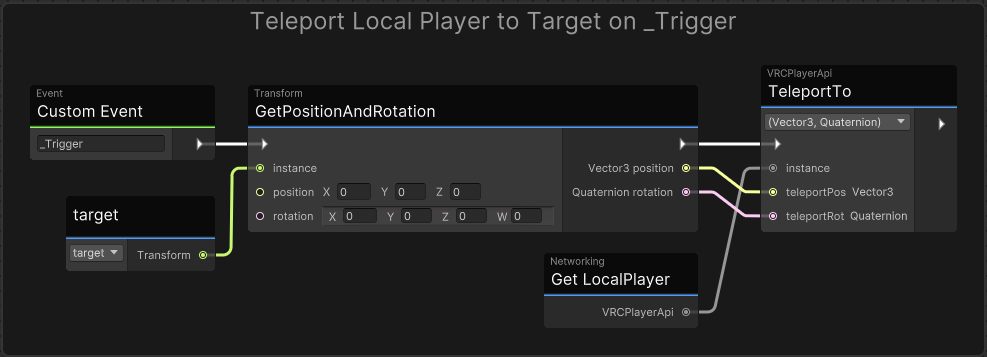
This program is triggered by the Button, which targets its _Trigger custom event. It has a public target Transform variable. When triggered, it calls Transform.GetPositionAndRotation() on the target, then passes the position and rotation to VRCPlayerApi.TeleportTo(position,rotation) to move the player.
You can change the value of the target to update the location, or move the TeleportTarget transform. Note that the transform has a child Sprite to show the spot on the ground where the player will be teleported, as a convenience. This Sprite is a child of the main transform because it requires a rotation that we do not want to apply to the player when they teleport.
Known Issue
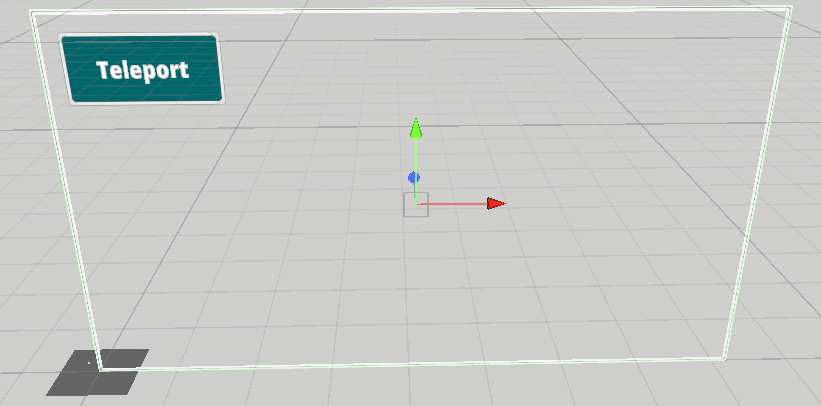
In ClientSim, the collider generated for the ScreenCanvas is always placed at (0,0,0) and covers the whole size of the canvas. In the VRChat Client, the existing collider is used and appears in the proper position. In order to make the scene usable in ClientSim, the initial spawn location is offset to place the user in front of the generated Collider.